Develop the first microservice
Preparement
Before developing the first Java-Chassis microservice, please make sure that your local development environment is prepared. See more details about this in Prepare the local development environment.
The Apache Service Center is needed in this show case. About using service center, please refer to Install of ServiceCenter.
Develop a HelloWorld microservice
pom configurations
First, please to create an empty maven project. It is suggested that the dependencies should be managed by dependencyManagement item, so that only the solution-basic is needed to be imported as dependency:
<dependencyManagement>
  <dependencies>
    <dependency>
      <groupId>org.apache.servicecomb</groupId>
      <artifactId>java-chassis-dependencies</artifactId>
      <version>${java-chassis-dependencies.version}</version>
      <type>pom</type>
      <scope>import</scope>
    </dependency>
  </dependencies>
</dependencyManagement>
<dependencies>
  <dependency>
    <groupId>org.apache.servicecomb</groupId>
    <artifactId>solution-basic</artifactId>
  </dependency>
</dependencies>
solution-basic has contains almost all of the dependencies you need in the common cases.
For the version 2.0.0 Java-Chassis, maven-compiler-plugin compilation plugin is also needed, which can make the method argument names preserved during the source project is build into a jar file.
<build>
  <plugins>
    <plugin>
      <groupId>org.apache.maven.plugins</groupId>
      <artifactId>maven-compiler-plugin</artifactId>
      <version>3.1</version>
      <configuration>
        <compilerArgument>-parameters</compilerArgument>
        <encoding>UTF-8</encoding>
        <source>1.8</source>
        <target>1.8</target>
      </configuration>
    </plugin>
  </plugins>
</build>
add microservice configurations
By default, Java-Chassis read configurations from the file named microservice.yaml placed in resources directory.
The content of the file is like below.
APPLICATION_ID: sample    # this microservice belongs to the sample application
service_description:
  name: helloworld        # this microservice is named "helloworld"
  version: 1.0.0
servicecomb:
  service:
    registry:
      address: http://127.0.0.1:30100  # this address of the service center
  rest:
    address: 0.0.0.0:8080
Main class
Add a main class in the project:
package org.apache.servicecomb.samples;

import org.apache.servicecomb.foundation.common.utils.BeanUtils;

public class AppMain {
  public static void main(String[] args) {
    BeanUtils.init();
  }
}
Invoking the org.apache.servicecomb.foundation.common.utils.BeanUtils#init() method will trigger the boot up procedure including configuration loading, Spring application context loading, microservice registration.
Write a REST service interface
Add a REST service interface class to declare the request you want to handle.
package org.apache.servicecomb.samples.service;

import org.apache.servicecomb.provider.rest.common.RestSchema;
import org.springframework.web.bind.annotation.GetMapping;
import org.springframework.web.bind.annotation.RequestMapping;

@RestSchema(schemaId = "hello")
@RequestMapping("/")
public class HelloWorldService {
  @GetMapping("/hello")
  public String hello() {
    return "Hello world!";
  }
}
Add log configuration
The solution-basic module introduces the log4j2 module. To enable it, a configuration file is needed. This file should be placed in resources\log4j2.xml and the content is like below:
<?xml version="1.0" encoding="UTF-8"?>
<Configuration status="WARN">
  <Appenders>
    <Console name="Console" target="SYSTEM_OUT">
      <PatternLayout pattern="%d{HH:mm:ss.SSS} [%t] %-5level %logger{36}[%L] - %msg%n"/>
    </Console>
  </Appenders>
  <Loggers>
    <Root level="info">
      <AppenderRef ref="Console"/>
    </Root>
  </Loggers>
</Configuration>
Start the microservice
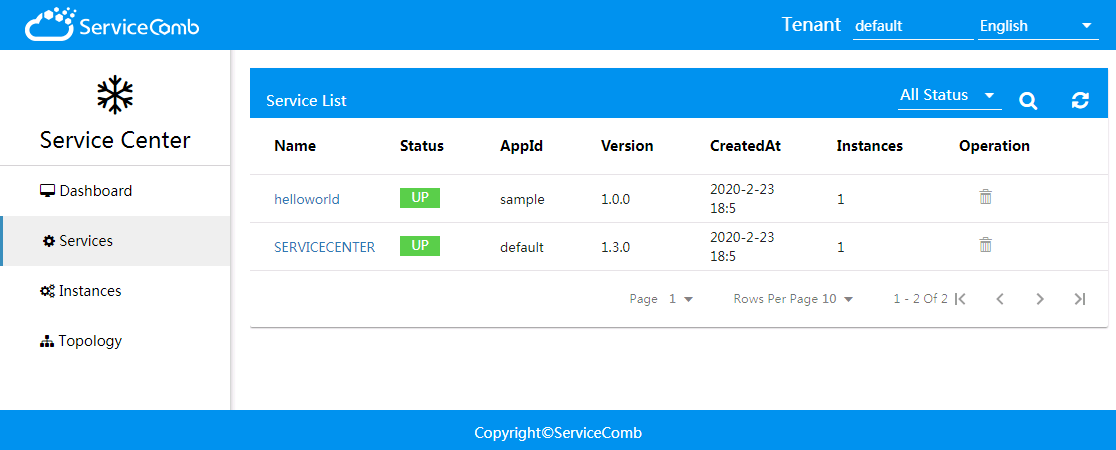
After completing the work above, the microservice can be started by running the AppMain class. Please visit the web page of local service center http://127.0.0.1:30103/. If the helloworld microservice instance is found like below, the microservice is started successfully.
If you visit the address http://127.0.0.1:8080/hello, you can see the response "Hello world!" from helloworld service. Now, your first Java-Chassis microservice is completed!.
Additional
The introduction demo is developed in Spring MVC style. And there are currently 3 ways to choose:
- Spring MVC
- JaxRS
- RPC
Developers can quickly build a project in following ways:
-
Download the samples project. servicecomb-samples provides many samples in hand.
- JaxRS Sample
-
Generate projects using archetypes
Maven provide archetypes to generate projects. Java-chassis implements many types of archetypes, see LINK for details.
- Generate projects using ServiceComb Spring Initializer
ServiceComb Spring Initializer is an graphic user interface to generate projects. See LINK